A Weekend…or four…with Limewash
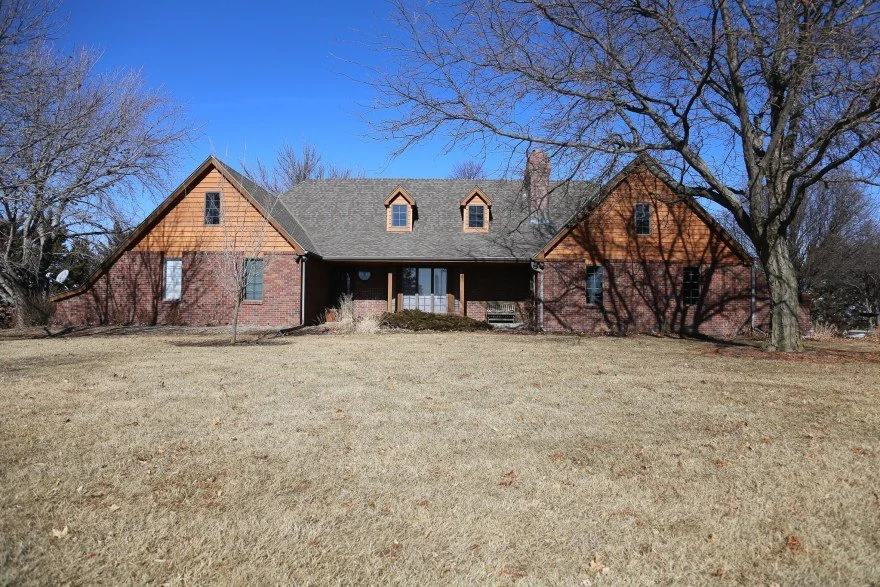
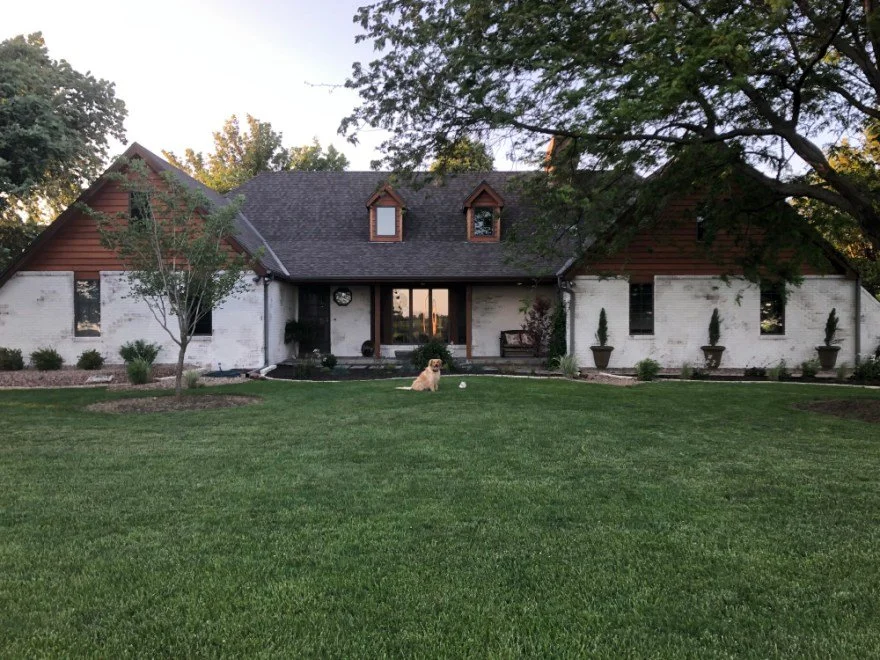
The first time Garrett and I saw the house, that has now become our home, our minds went spinning with all of the updates and projects we could bring to the property to not only make it our own, but also to give it a fresh look to align with our style. One of those updates we immediately identified was painting the exterior. What we did not pinpoint is how quickly that plan would come to fruition, nor what product we would ultimately use.
Back track a couple of months ago after moving in and I was walking the aisles of Home Depot, and I came across a limewash product called Classico Limewash by ROMABIO. I had heard of limewash before and had pinned some homes with limewashed exteriors, but I had never used it before, nor had I heard of ROMABIO.
Before painting our entire house, we tested Avorio White on a retaining wall in our back yard.
Our local Home Depot had two color selections: Avorio White — what we ended up choosing for our home — and Bianco White. I picked up one quart of each and brought them home to sample. After doing some research online, testing out the samples, and deciding to move the plan forward for rest of our home, here are some tips I’d like to share with you:
APPLICATION PROCESS
Limewash can be applied to brick, stone, and other masonry surfaces. I’ve also heard of it being used for creative applications indoors and even on wood. It is best to apply with a brush or a sprayer, but does not fair well with paint rollers.
The ROMABIO limewash comes as concentrated clay-like substance that you must dilute by up to 100% prior to application. We utilized a five-gallon bucket, hammer drill with paddle mixer, and an old kitchen whisk to dilute our limewash.
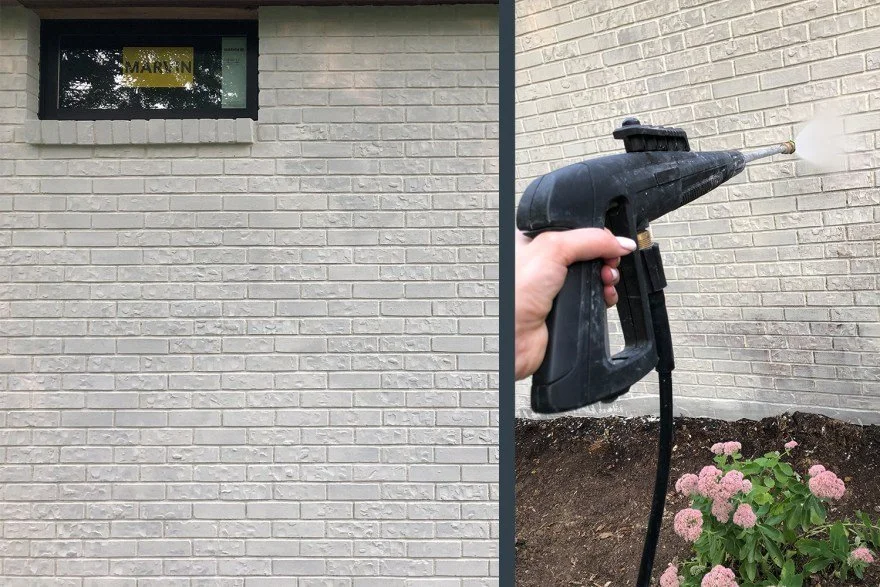
The brick has been sprayed with water in preparation to be painted with limewash.
Prior to brushing or spraying the limewash on your surface, the surface should be wet to allow for ease of application. Brick is porous and Iimewash adheres strongly to its surface once dry. We used these masonry brushes from Menards to brush on our limewash and our regular garden hose to prep our brick for painting.
DISTRESSING PROCESS
After we worked diligently to cover every grout line, then came the fun — distressing the limewash. ROMABIO product specifications recommend letting the limewash dry 10-60 minutes prior to distressing, but I found that letting the product dry overnight actually worked the best for me to allow for even distressing. I utilized a power washer about 8-12 inches away from the surface of the brick to create a worn, rustic look to our freshly painted home.
On the left, the freshly painted brick is drying and waiting to be distressed the next day.
To find the best dry time for your project, I recommend experimenting a bit. On a sunnier day, the limewash will dry harder and faster than on a cloudy day. The sooner you distress after application, the easier the limewash will come off and will not require use of a power washer for distressing. A simple garden hose with spray attachment should suffice.
TOTAL COST OF UPGRADE
If you saw my instagram post, you’re probably still wondering how I spent $50.00 and covered the entire brick exterior of my home. Honestly, I lucked out. When I found the ROMABIO Classico Limewash in Home Depot, it was on sale for $25.00 per four-gallon bucket. Typically a four-gallon bucket of ROMABIO Classico Limewash retails for $250.00. Using two four-gallon buckets of concentrated limewash, we were able to cover our entire brick exterior with about six gallons (before diluting 100%).
A word for the DIY’er — cheers to you. While even at full-retail pricing, you will save a heap tackling this paint job your self. However, don’t underestimate the amount of sweat equity that will be required of this project. The article title says it all — Garrett and I spent at least four weekends working on this project but the results are totally worth it!
REAL ESTATE WRAP UP
From a real estate scope, curb appeal makes all the difference whether you’re selling your home or shopping for a new one. If you have questions about how you could upgrade your curb appeal or my experience with limewash, drop a comment below or give me a shout. I’m happy to create some options for your home.


